Skip to content
Getting the Geometry Right: How Solid Carbide End Mills Deliver Finish, Tool Life, and Cost — And How to Regrind Them the Right Way
Table of Contents

If you cut metal for a living, the price of an end mill is never the full story. Geometry, flute count, helix, edge prep, and how the tool is reground after wear all decide whether you hit tolerance at speed—or fight chatter, rubbing, and scrap. This guide distills practical, operator‑tested rules you can use immediately on the shop floor or in CAM, with clear checkpoints for procurement and regrind. It’s written for HNCarbide.eu customers machining steels, stainless, superalloys, cast iron, aluminum, and engineering plastics on modern VMCs and HMCs.
What to Specify When You Buy
Before angles and coatings, make sure the physical spec fits the job and your holder. The five must‑have fields for a cylindrical solid‑carbide end mill are cutting diameter, length of cut, shank diameter, overall length, and flute count. Getting these wrong forces compromises later in speeds/feeds and tool stick‑out.
Purchase Checklist for Solid Carbide End Mills
Field | Why it matters | Quick check |
Cutting diameter (Dc) | Determines step‑over, slot width, and rigidity | Match to feature + holder nose clearance |
Length of cut (Lc) | Controls how deep you can engage without rubbing the shank | Keep as short as the work allows |
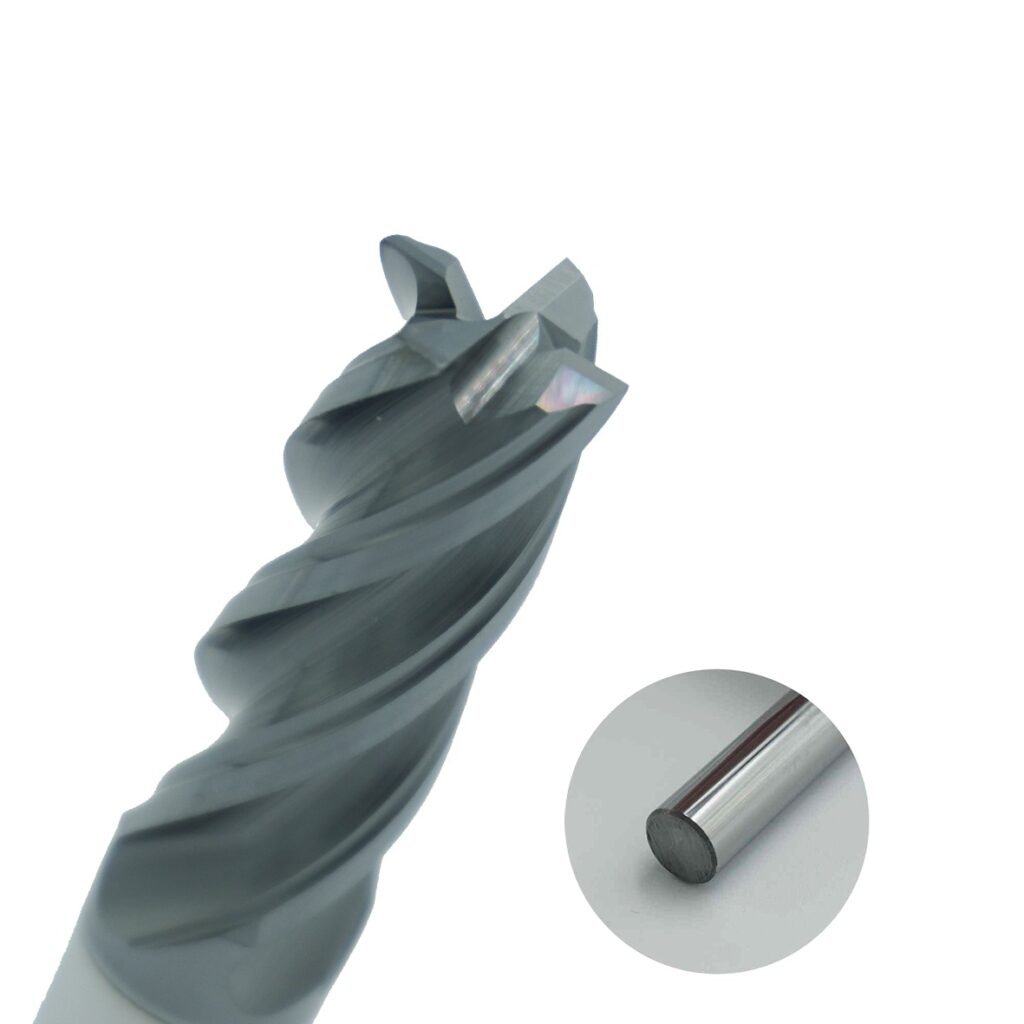
Shank diameter (Ds) | Sets clamping stiffness and runout tolerance | Use standard sizes for shrink/ER/collet |
Overall length (OAL) | Impacts stick‑out and chatter | Minimize; use extension only if required |
Flute count (z) | Balances chip evacuation vs rigidity and finish | Choose by material and toolpath |
The Three Angles That Run the Show
Every end mill’s behavior—forces, chip shape, heat, and surface integrity—comes down to rake angle, relief (clearance) angle, and helix angle. Think of these as the drive train of your cutter.
Rake angle (positive vs. negative)
Positive rake lowers cutting forces and can shear sticky alloys more cleanly, but leaves a thinner wedge and reduced edge strength. Negative or small rake increases wedge strength for hard or interrupted cuts, with more pushing and potential heat. Selection should reflect both material plasticity and your programmed chip thickness.
Practical tip: pair modest positive rake with stainless and high‑temp alloys to help shearing; use smaller rake in hard steels or heavy roughing where edge strength rules.
Relief (clearance) angle
Relief keeps the flank from rubbing the newly machined surface. Too little relief = heat and chatter; too much = weak edge. For end‑face grinding, primary relief typically runs ~6–8°, backed by a secondary relief of ~30–45° to open chip flow and reduce rubbing. For harder, stronger materials, use smaller relief to keep the wedge strong. For ductile or springy materials, use more relief so elastic spring‑back doesn’t force the flank to rub.
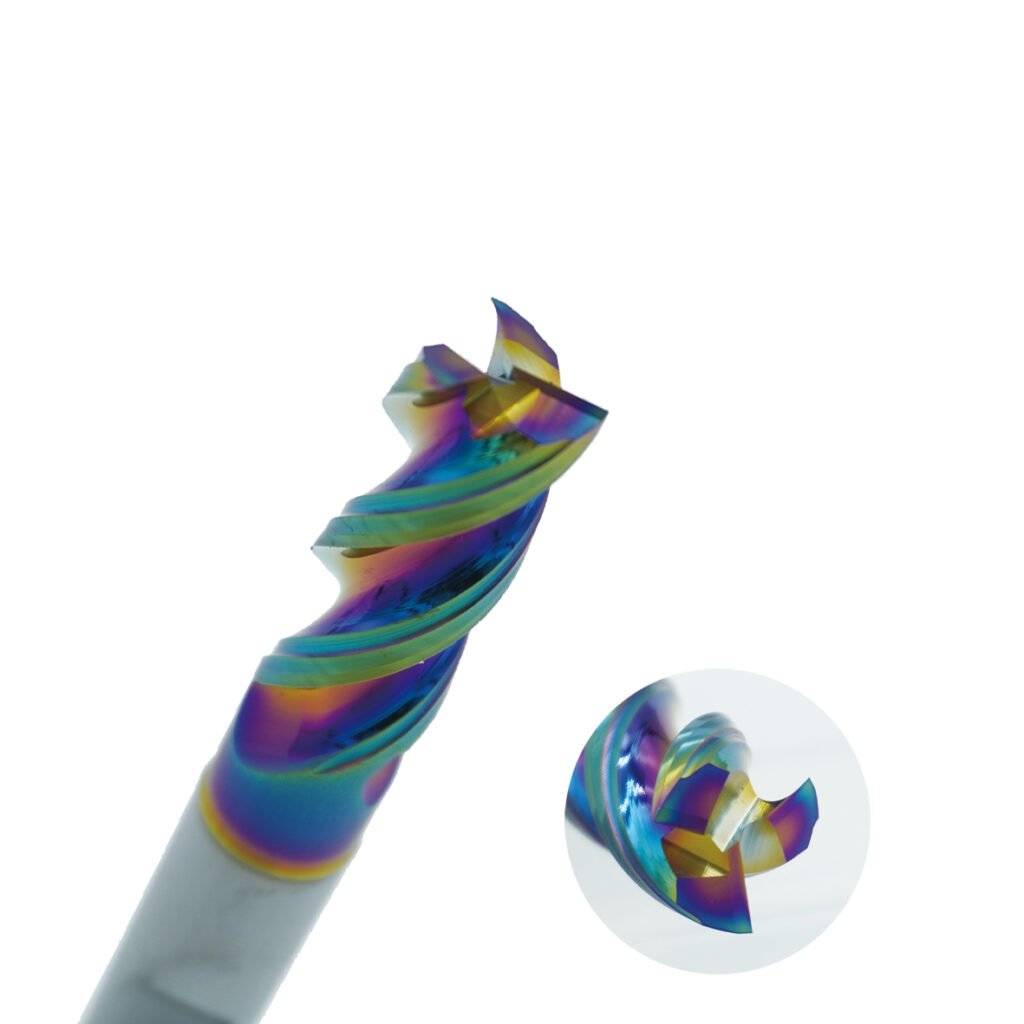
Helix angle (30° vs. 45° and beyond)
Helix controls axial vs. radial force split, chip lift, and vibration behavior. A ~30° helix delivers better rigidity and a strong core for steels and cast iron; it suits lower‑speed, higher‑feed roughing. A ~45° helix provides a sharper entry and smoother cutting in gummy alloys; it suits higher‑speed, lighter‑chip finishing and is often preferred for stainless and high‑temp alloys. Smaller helix angles reduce axial pull but increase torque; larger angles increase axial load and can reduce core stiffness.
Flute count and chip room
Flute count sets the balance between chip evacuation and tool rigidity/surface finish: 2‑flute offers maximum chip room for keyways and deep slots; 3‑flute is a sweet spot for aluminum, plastics, and composites; 4‑flute is the general‑purpose workhorse for steels and mixed shops.
Material‑Wise Geometry Selection
Use this matrix to pick a starting geometry that CAM can refine with step‑over and chip thickness. Coating choices further tune heat and wear but are outside this geometry‑first guide.
Starting Geometry by Workpiece Material
Material family | Helix angle | Rake tendency | Relief (primary / secondary) | Flute count | Why |
Low/medium‑carbon steels | ~30° | Neutral to small positive | 6–8° / 30–45° | 4‑flute | Rigid core; reliable chip lift at modest SFM |
Alloy/tool steels (≤50 HRC) | ~30° | Small | 6–8° / 30–45° | 4‑flute | Maintain edge strength; feed hard enough to avoid rubbing |
Stainless (austenitic) | ~45° | More positive | 6–8° / 30–45° | 4‑flute rough / 4–5 finish | Sharper entry to shear gummy chips; protect against work‑hardening |
High‑temp alloys (Ni/Co) | ~45° | More positive | 6–8° / 30–45° | 4–6 | Higher helix smooths entry; keep chip thin and moving |
Cast iron | ~30° | Neutral | 6–8° / 30–45° | 4‑flute | Brittle chips; prioritize core strength and stability |
Aluminum (wrought) | 35–45° | Positive | 8–12° / 30–45° | 3‑flute | Big chip gullets and sharp rake prevent BUE; high fz |
Engineering plastics | 35–45° | Positive | 10–12° / 30–45° | 2–3 | Sharp edges and clearance minimize heat and smearing |
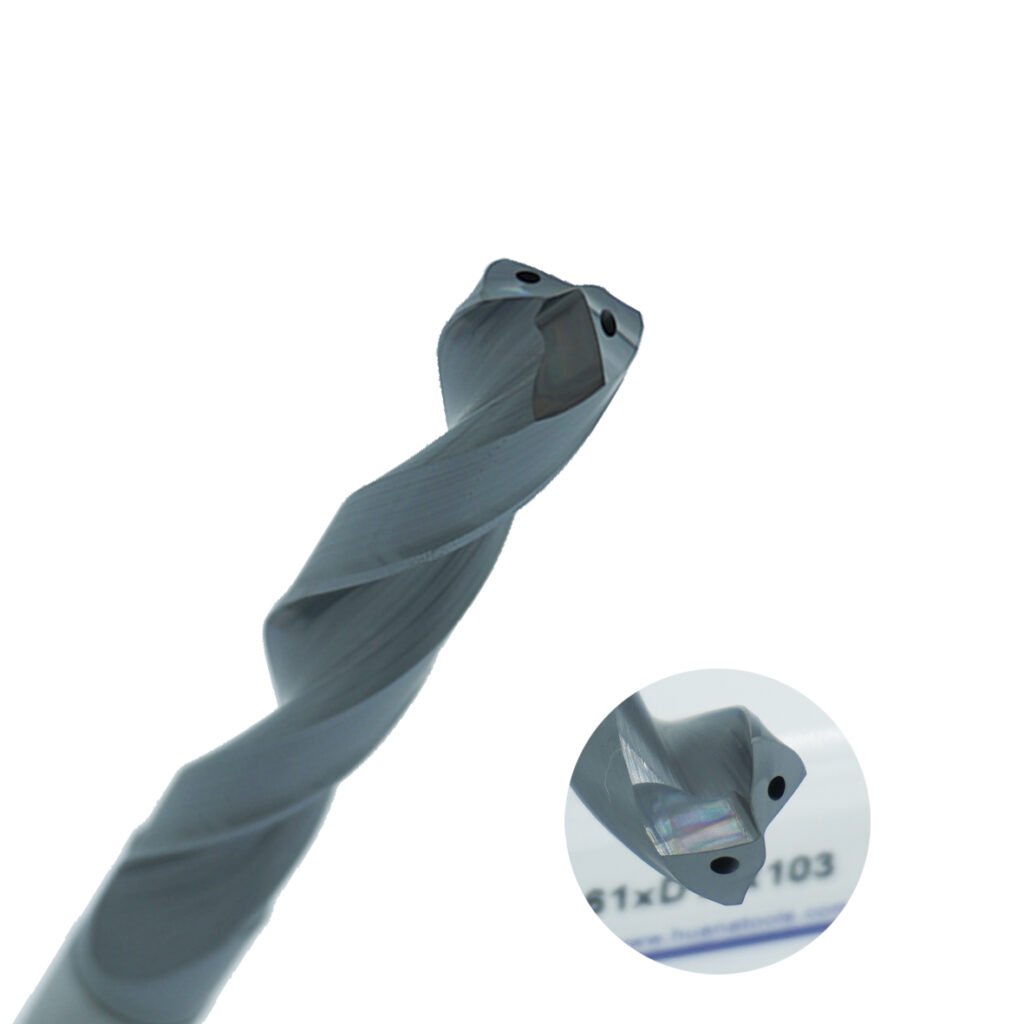
Note: When your tool is center‑cutting, end‑face geometry must include a concave center (center dip) so the tips contact first and the center doesn’t rub.
Why End‑Face Geometry Makes or Breaks Performance
Even with a perfect helix and rake, a flat or convex center on the end face will smear, push off, and burn. Correct end‑face geometry uses: 1) primary end clearance to sharpen the cutting lip and avoid bottom rubbing; 2) secondary end clearance to open chip flow off the end face; and 3) a slight concave center so only the perimeter engages when plunging or when the Z‑height kisses the floor on a finishing pass. If you’ve ever seen floor finish roughness improve at greater axial depth, this is why,more of the sharp perimeter engages, averaging runout and producing a cleaner lay.
The Right Way to Regrind a Solid Carbide End Mill
A good regrind returns geometry to spec and ensures all lips share the same plane. The workflow below is robust in job‑shop conditions and scales to production regrind cells.
Dress and true the wheel before cutting carbide
Check for runout, uneven cylindrical faces, and excessive corner radius. Dress with a diamond dresser (or an appropriate dressing wheel) until the wheel face is true; replace if the side face is no longer flat.
Square the end—get every lip coplanar
Before re‑forming edges, grind the end face perpendicular to the tool axis so the highest points of all flutes lie in the same plane. Use a flat‑plate touch test or a right‑angle square for verification.
Create the end‑face geometry
Grind ~6–8° primary relief and 30–45° secondary relief; ensure all flutes dip toward the center so only the perimeter engages first.
Add a cross‑slot when needed (4‑flute tools)
Form a shallow cross‑slot along the flute helix about 1–2 mm deep to improve end‑face chip evacuation. Don’t over‑cut; too deep weakens the edge.
Refinish the side cutting edges
If the flank is worn, follow the flute helix with a small‑diameter wheel to restore the side relief. Control taper and maintain a crisp, concentric edge.
Post‑grind inspection you can trust
Stand the tool on a flat plate to verify four‑point contact (for 4‑flute) and perpendicularity. Loupe the edge to confirm no micro‑chipping.
End‑Face Grinding Targets and Why They Work
Feature | Typical value | Purpose | What goes wrong if missed |
Primary end relief | 6–8° | Keeps flank off the floor; sharpens lip | Rubbing, heat, poor floor Ra |
Secondary end relief | 30–45° | Opens chip channel; reduces contact | Chip packing, built‑up edge |
Center concavity | Slight dip toward center | Perimeter cuts first; stabilizes plunge | Push‑off, burnished floor, chatter |
Cross‑slot (4‑flute) | 1–2 mm deep | Extra chip room at center | Too deep = chipping; too shallow = poor evacuation |
Wedge angle tuning | Slightly larger for roughing | More edge strength under load | Premature chipping if too thin |
Helix Angle in Practice: Choosing Between 30° and 45°
If you run one house geometry across mixed work, the choice usually comes down to shop mix and machine thrust. Mostly steels and cast iron with frequent slotting? Choose ~30° helix for core stiffness and predictable torque. A lot of stainless or Ni‑base work with finishing toolpaths at higher SFM? Choose ~45° helix for smoother entry and lower cutting forces per flute—watch axial pull and program chip thinning accordingly. Remember that more flutes improve finish and stiffness but reduce chip room. If chip evacuation is the constraint, drop a flute and increase feed per tooth to form a real chip instead of powder.
Corner Prep and Edge Integrity
Unless you’re clearing internal corners, a small corner chamfer (~0.2 mm or larger) adds dramatic edge strength with minimal penalty to feature accuracy. It’s a simple way to extend life in roughing without changing the CAM strategy. Consider edge‑hone for abrasive materials and uncoated tools, but avoid over‑hone in gummy alloys where sharpness controls BUE.
Troubleshooting: Symptoms That Point to Geometry
- Chatter on floor finish, good walls — End‑face center likely too flat; increase center concavity and confirm equal lip height.
- Burnished floor and shiny rings — Insufficient primary/secondary relief; regrind to 6–8° and 30–45°.
- Chip welding in stainless — Helix too low or rake too small; move toward a 45° helix and sharper wedge; increase coolant velocity and real chip thickness.
- Corner chipping in roughing — Wedge too thin; add a small corner chamfer and reduce rake or relief slightly.
- Push‑off during plunging — End center convex; force the center dip and verify all tips share the same plane.
Process Control: A Simple, Repeatable Regrind SOP
- Incoming inspection: photograph wear patterns; note crater wear vs. chipping to guide wedge adjustments next cycle.
- Wheel dress & setup: true the wheel; confirm runout; record dresser offsets in a log.
- End squaring: grind end perpendicular; verify coplanarity by flat‑plate touch test and square.
- Form primary/secondary relief: hit 6–8° and 30–45°; produce clear center dip.
- Cross‑slot (if needed): cut 1–2 mm; avoid striking adjacent lips.
- Side relief touch‑up: helical follow grind as required; control taper.
- Final checks: four‑point contact on the plate; square verification; loupe edge for microchips; mark geometry on the traveler for traceability.
CAM Notes: Make Geometry Work for You
Program real chip thickness: higher flute counts often mean lower fz but higher feedrate overall; don’t starve the edge. Leverage axial depth: a slightly deeper axial cut can improve floor finish by engaging more of the sharp perimeter—especially once the end face is ground correctly. Select step‑over by helix: with 45° helix in gummy alloys, prefer lighter radial step‑over and higher SFM; with 30° in steels, you can push radial engagement further with dynamic paths.

Economics and Quality: Regrind Schedules That Pay
A consistent geometry‑first regrind routine shifts your cost curve: the first life captures the coating premium and roughing throughput; the second and third lives deliver most of the margin. Schedule regrind at a repeatable flank‑wear land width rather than running to failure. Tracking a simple cost‑per‑edge metric (tool cost + regrind + setup time divided by usable edges) helps justify planned changeover and reduces unplanned scrap.
Key Takeaways
- Nail Dc, Lc, Ds, OAL, and flute count before buying.
- Use ~30° helix as a steel/cast‑iron default; move to ~45° for stainless and superalloys.
- Keep primary relief ~6–8° and secondary 30–45°; ensure a center dip on the end face.
- Match flute count to chip room: 2‑flute (keyways), 3‑flute (Al/plastics), 4‑flute (steels, general use).
- Regrind is a process: dress → square → reliefs → cross‑slot (if needed) → side relief → inspect.
HNCarbide.eu manufactures and regrinds solid carbide end mills to the geometries above and can tune helix, rake, and relief for your exact throughput and machine envelope. Share your material list, average engagement, and surface finish targets—we’ll recommend a proven geometry set and regrind schedule that reduces cost per component without sacrificing capability.