Twist Drill Chisel Edge and Regrinding—A Complete, Shop-Ready Guide
Table of Contents
Why the chisel edge deserves your attention
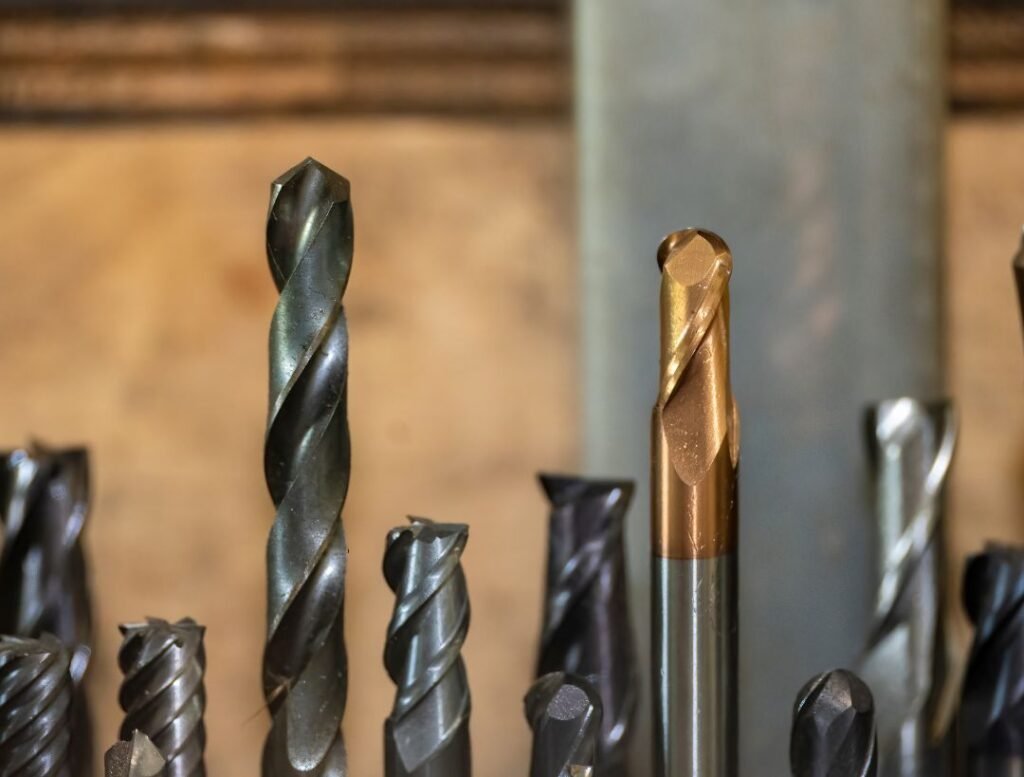
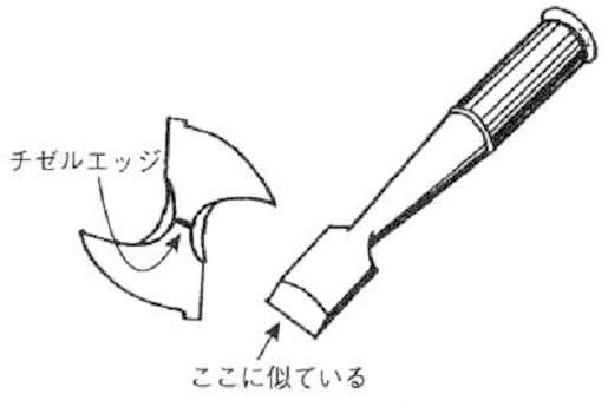
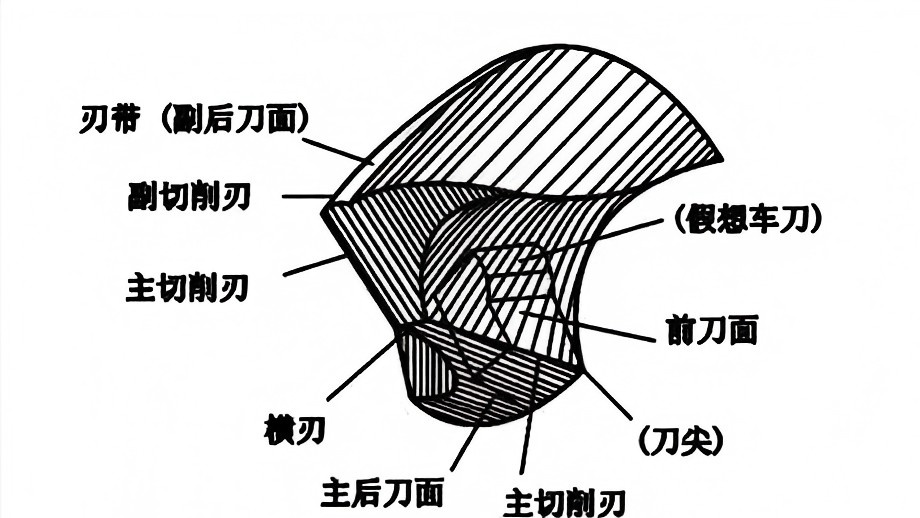
At the very center of a conventional twist drill is a short “edge” that isn’t really a cutting edge at all—the chisel edge, created where the web surfaces intersect. Instead of shearing metal, this tiny wedge pushes it. Think of it as a miniature flat chisel: it extrudes material, requires high axial thrust, generates heat, and offers poor self-centering—especially on curved or inclined surfaces.
Shortening or splitting this chisel edge—web thinning—is the most powerful single modification you can make to a drill. Do it correctly and you will feel the difference at the feed handle: smoother entry, lower thrust, cleaner chips, and better hole position.
Geometry that frames every regrind
Before touching a grinding wheel, align on a few anchor values. These aren’t laws of nature, but they are robust starting points:
Point (included) angle: 118°–120° for general steels and cast iron; 135° where thrust must be minimized or materials are tough/work-hardening.
Lip relief (at the margin): 10°–14°. Too small → rubbing/heat; too large → thin, fragile lips and polygonal hole mouths.
Chisel (slope) angle: 50°–55° in plan view.
Symmetry: Two lips must be equal in length and in height relative to the axis. Any inequality shifts the chisel off-center, causing the drill to walk and the hole to oversize.
Web thickness: Governs how much material must be removed during thinning; thinner webs need gentler splits to protect the center.
The diagrams you shared illustrate a key truth: good drilling starts with consistent geometry, then gets better with smart modifications at the center.
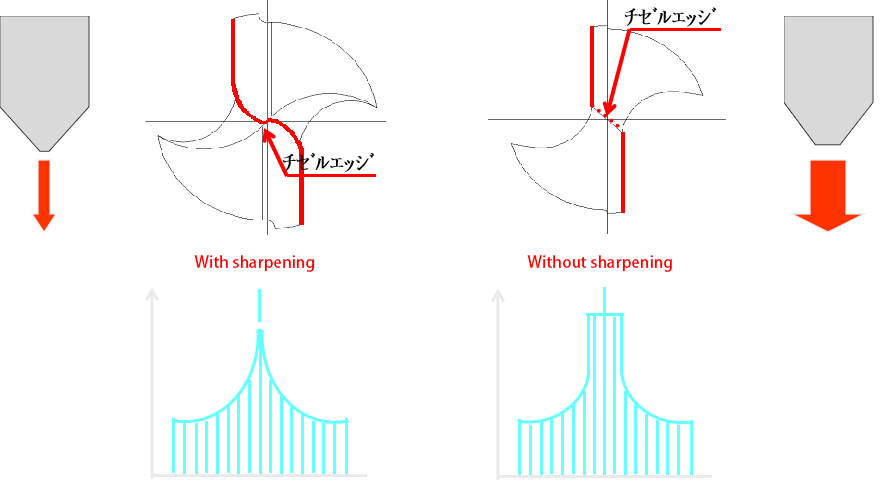
What web thinning really changes
The chisel edge’s negative rake concentrates load at the center. Thinning re-shapes that zone so the center cuts rather than punches:
Thrust drops—often by 25–50% versus a standard conical point.
Self-centering improves because the split tips meet on the axis and begin shearing immediately.
Chips segment more reliably, so evacuation and breakthrough become cleaner.
Heat decreases thanks to lower extrusion work at the center.
The final geometry is a compromise: short enough chisel for low thrust, but not so short that the tip becomes fragile at breakthrough.
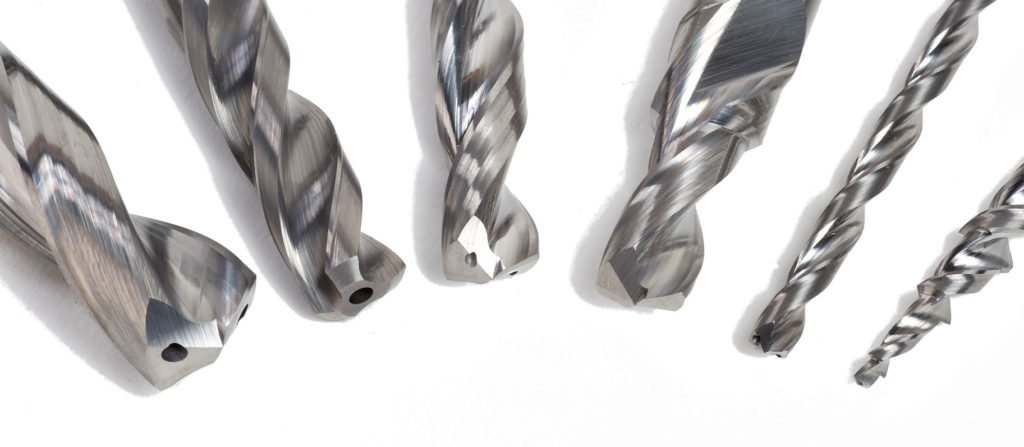
The main web-thinning families
Different catalogs use different names, but the functions match.
X-type (classic split point): Two narrow splits create twin central tips with positive effective rake. It’s the workhorse for general steel and stainless, terrific in hand drills, and easy to reproduce on a bench grinder.
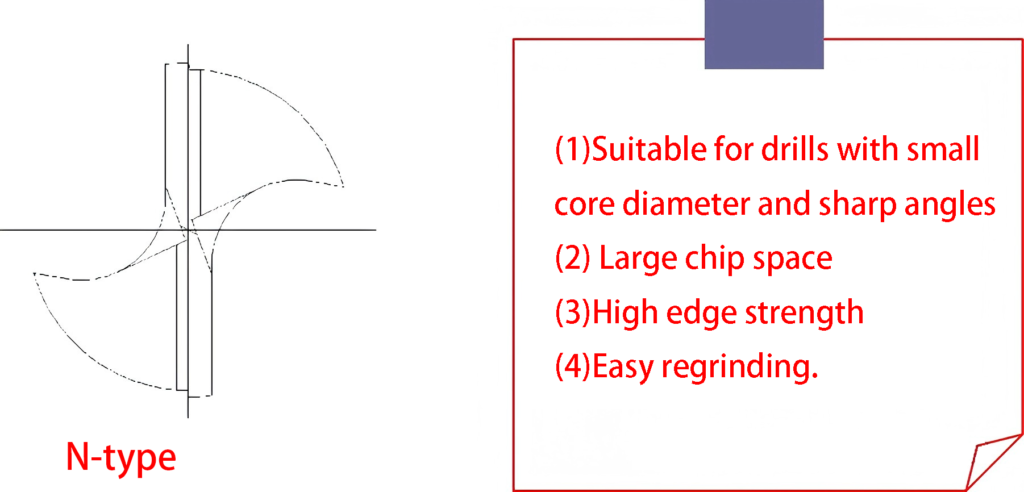
N-type (four-facet): Two secondary facets intersect at the axis to form a true point. Centering is excellent and regrinds are highly repeatable—ideal for position-critical holes on CNC machines.
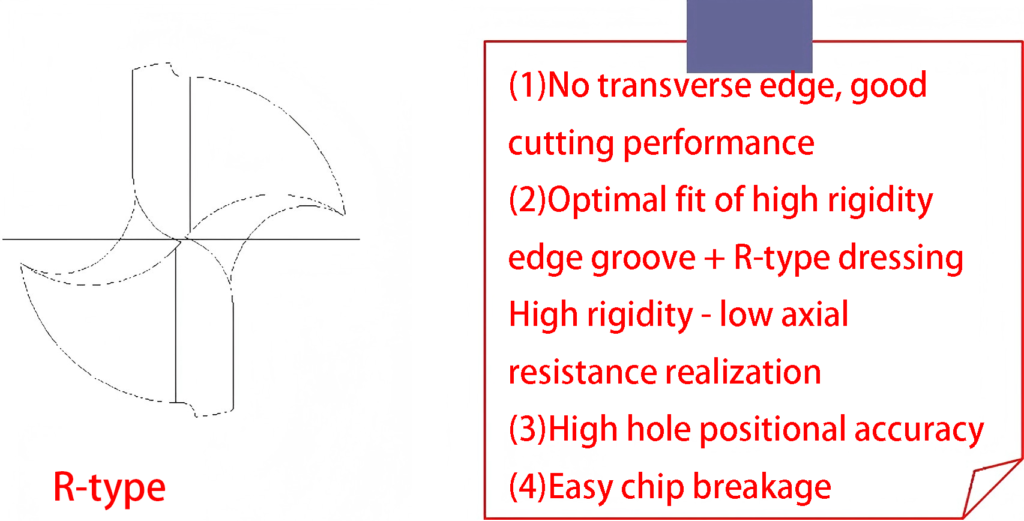
R-type (rounded center relief): Shortens the chisel without sharp split corners, keeping the tip strong and thrust smooth. A smart choice for cast iron and rigid setups where tip strength matters.
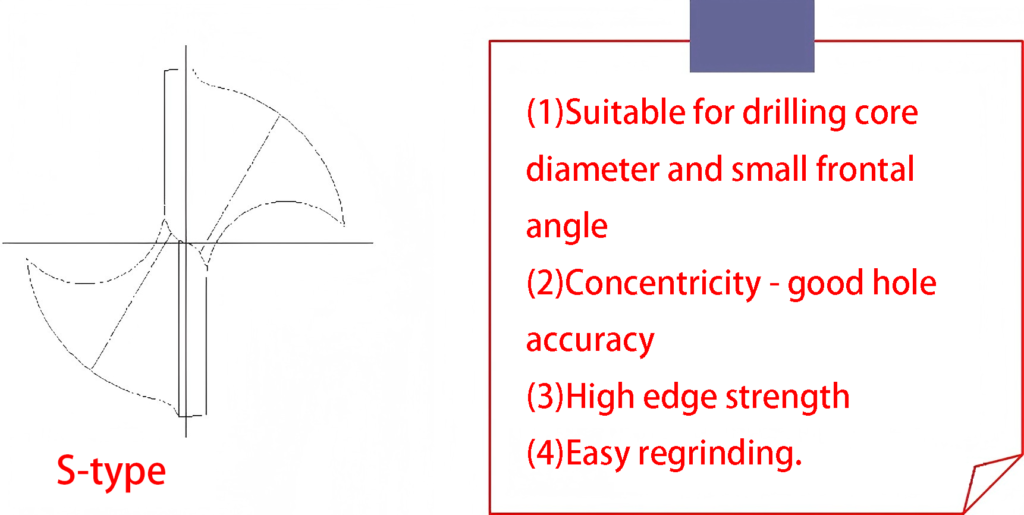
S-type (steep split with supportive heel): Tailored for thin webs and small point angles. It keeps the central wedge robust while still lowering thrust.
If you standardize on X or N for most work and keep R as a strength-biased option, you’ll cover nearly all shop situations. Use S when you’re dealing with small diameters or thin cores.
Recommended Drill-Point Geometry by ISO Material Group
ISO group | Point angle (°) | Lip relief (°) | Preferred web-thinning | Target chisel length (%D) | Coolant note |
P – Carbon/low-alloy steels | 118–130 | 10–12 | X or N | 3–6 | Water-soluble flood; peck for deep holes |
M – Stainless steels | 130–140 | 12–14 | X or N (polished rake) | 2–5 | High-pressure coolant recommended |
K – Cast irons | 118–130 | 8–12 | R or N | 4–7 | Often dry/air; avoid smearing |
N – Non-ferrous (Al/Mg/Cu) | 90–110 | 12–16 | N or light X | 2–4 | MQL or flood; large chip space |
H – Hardened steels (spot/carbide) | 135–140 | 8–10 | N (four-facet) | 2–4 | Flood; minimal pecking |
%D = percentage of drill diameter. Start here, then tune for your machine and coating.
A repeatable bench-grinder routine
Many people “sort of” grind drills. The following sequence turns good intentions into reliable geometry. Practice first on worn drills.
Present the lip level. Hold the active cutting lip horizontal to the wheel face before contact. This ensures the entire edge meets the wheel together.
Set the axis at ~60° to the wheel tangent. That’s half a 118° point. A 30–60–90 triangle gauge helps enormously. This setup governs the point angle, lip line, and chisel slope.
Grind from edge to heel. Touch the wheel at the cutting edge, then slide toward the heel in a smooth arc. Short engagements, frequent quench. Watch the spark band—it should trace evenly along the relief.
Rock—don’t twist—and keep the tail down. Use a gentle up-down rocking to create relief. Don’t roll the drill axially; it ruins the lip line. The shank should not rise above the wheel centerline, or the edge will blunt.
Mirror the other lip. Equalize length and height. If the chisel is off-center, one lip is longer or higher—correct it lightly.
Thin or split the web. Apply X, N, R, or S depending on material and machine thrust. Keep the chisel short but present—a tiny center improves durability.
Stone the margins. Remove micro-burrs for a clean entrance and lower friction.
Inspection: tolerances that matter
Point angle: 118–135° (±2°).
Lip relief at margin: 10–14°.
Lip length equality: ΔL ≤ 0.1 mm or ≤2% of D.
Lip height equality: Δh ≤ 0.03 mm (≈0.5°).
Chisel centered: within 0.05·D of the axis.
Runout at margin: ≤0.02 mm (carbide) / ≤0.04 mm (HSS).
These small checks prevent the usual why-does-this-walk questions at the machine.
Web-Thinning (Split-Point) Styles: Quick Comparison
Style | Thrust vs. no thinning | Centering | Edge strength | Regrind ease | Best use cases |
X (classic split) | ↓ 25–40% | Very good | Medium | Good | Hand drills, general steels & stainless |
N (four-facet) | ↓ 30–50% | Excellent | Medium–high | Very good | Position-critical holes on CNC |
R (rounded relief) | ↓ 15–30% | Good | High | Good | Cast iron/general steel with limited thrust |
S (steep split + heel) | ↓ 20–35% | Good–very good | High at tip | Good | Thin webs, small point angles |
Material-specific notes
Steels (ISO P).
A 118–130° point with X or N thinning is a safe baseline. Use flood coolant, and peck for deep holes. If the machine is light, prefer a split point (X) for lower thrust.
Stainless (ISO M).
Work-hardening and poor chip curling demand sharp lips, positive rake near the center, and often a 135° split point. High-pressure coolant helps break chips and cool the margin.
Cast irons (ISO K).
Brittle chips mean evacuation is easy. You can keep a stronger center using R-type thinning or even a lightly thinned conical point; many shops run dry or with air.
Aluminum & non-ferrous (ISO N).
High-positive rake and polished flutes are everything. A light N or X split prevents walking on sheet and extrusions. Use MQL or flood; make chip space generous.
Hardened steels (ISO H).
When spotting before carbide drilling, a precise four-facet (N) point locates beautifully and keeps thrust modest.
Troubleshooting: from symptom to fix
Even a tiny geometry error shows up loudly in the hole. Use the table below as your first-aid kit.
Regrind Troubleshooting (Symptom → Cause → Fix)
Symptom | Likely cause | Corrective action |
Drill walks / hole off-position | Unequal lip length/height; no split point | Equalize lips; apply X/N thinning |
Excessive feed force / squeal | Long chisel; negative rake at center | Thin/split web; increase local rake |
Blueing / overheating | Relief too small; dull edge; poor coolant | Increase relief; resharpen; add coolant |
Tip chipping / fragile center | Relief too large; over-thinning | Reduce relief; shorten split; add micro-land |
Triangular/pentagonal mouth | Relief too large; vibration/overhang | Reduce relief; shorten overhang; secure work |
Long string chips / jams | Feed too low; no chip break | Raise feed slightly; peck; use split point |
Rough exit / heavy burr | High feed at breakthrough; no backing | Ease feed last 0.5–1.0 mm; use a backer plate |
Five pragmatic tweaks that pay off fast
Shorten the chisel—but don’t delete it. A tiny, centered remnant protects the tip at breakthrough.
Create positive effective rake at the center. Good thinning turns pushing into shearing right where it matters most.
Use slightly larger relief behind the split. This reduces rubbing near the centerline and helps chips separate.
Adjust point angle to your available feed. If the machine or hand pressure is limited, a slightly smaller point angle (toward 118°) increases normal pressure on the cutting face and helps the lips “bite.” Don’t go so small that lips become weak.
Where roughness/diameter allow, a tiny intentional asymmetry at the mouth can reduce margin rub by opening the entrance a hair—use with judgment.
HNCarbide drill solutions
Turning the above principles into everyday reliability takes both good technique and well-designed drills. HNCarbide offers a focused range aligned to the geometry you’ve just read about:
HN-SP135 Split-Point Jobber (HSS-Co, PVD-coated)
135° X-type split for low thrust and accurate starts. Edge prep balances sharpness and durability; AlTiN/TiAlN coatings hold hardness at temperature. Sizes Ø1.0–13.0 mm in 0.1 mm steps (DIN 338, h8). Excellent for steels and stainless—including hand-drill work.
HN-4F Four-Facet Carbide (Coolant-ready ≥ Ø3.0 mm)
N-type geometry with a short, centered chisel by design. Micrograin carbide and multilayer PVD for long life. Outstanding for position-critical CNC holes in alloy steels and cast iron.
HN-R Balanced-Thrust (R-type relief)
Conical point with rounded web relief for smooth axial load and a strong center. Ideal when machine thrust is limited or cast iron dominates.
HN-N Alu-Polished
Highly positive rake, mirror-polished flutes, light split for zero walking in aluminum and other non-ferrous alloys. Supports MQL or flood.
Service & support: We regrind to original X/N/R/S geometries and can map your materials to point-relief-thinning templates, complete with speed/feed starting charts for your machines.

Standardize inspection and capture your best settings; pair the method with HNCarbide drills for consistent, low-effort, high-quality holes